I've been daily driving Macs as my portable device for over a decade. Mainly for their build quality and impressive battery life.
Apple's release of Apple Silicon (originally with the M1 chip) took things up a notch. Being ARM64 architecture, the chips perform really well while maintaining a good power per watt ratio. Plus macOS is tuned directly for these chips too. I picked up a Mac Mini with an M2 Pro in it for a home server and it's handled everything I've needed from VMs, Docker containers and more.
When I needed to setup a macOS build agent for Azure DevOps, the Mac Mini came to mind as a perfect build server too... assuming that it all works natively on ARM64. Good news is, its possible! Here's how to do it.
Installation
I've tried to shorten all the steps to a single script, then some post config to make the install as easy as possible. It also means you can run multiple build agents on the same machine without conflicts too.
Note: I've tested this on macOS Ventura and above. If there are breaking changes, I'll do my best to keep this up-to-date.
Build script
Copy the following into an ado-agent.sh file and update the variables at the beginning for your agent:
#!/usr/bin/env zsh
AGENT_NAME="air-m2"
AGENT_VERSION="4.254.0"
AGENT_ARCH="osx-arm64"
AGENT_FILENAME="vsts-agent-${AGENT_ARCH}-${AGENT_VERSION}.tar.gz"
BASE_DIR="${HOME}/ado-agents"

#setup directory for agents
if [[ ! -d "${BASE_DIR}" ]]; then
    echo "Creating base agent directory '${BASE_DIR}'..."
    mkdir -p "${BASE_DIR}"
fi
cd "${BASE_DIR}"

#download latest agent payload if not already present
AGENT_URL="https://download.agent.dev.azure.com/agent/${AGENT_VERSION}/${AGENT_FILENAME}"
if [[ ! -f "./${AGENT_FILENAME}" ]]; then
    echo "Downloading '${AGENT_URL}' to '${BASE_DIR}'..."
    curl -o "./${AGENT_FILENAME}" "${AGENT_URL}"
    xattr -c "./${AGENT_FILENAME}"
else
    echo "Agent file '${AGENT_FILENAME}' already exists. Skipping download."
fi

#unzip the agent to the correct location if it doesn't exist
if [[ ! -d "${AGENT_NAME}" ]]; then
    echo "Extracting agent to '${AGENT_NAME}'..."
    mkdir -p "${AGENT_NAME}"
    cd "${AGENT_NAME}"
    tar zxvf "../${AGENT_FILENAME}"
else
    echo "Agent directory '${AGENT_NAME}' already exists. Skipping extraction."
fi

echo "Now run: 'cd ${BASE_DIR}/${AGENT_NAME} && ./config.sh && ./svc.sh install && ./svc.sh start'"
If you don't want to chmod +x the script, you can also execute as a one-off zsh ./ado-agent.sh. After running the script, you should see a message to run a command to configure the agent like below:
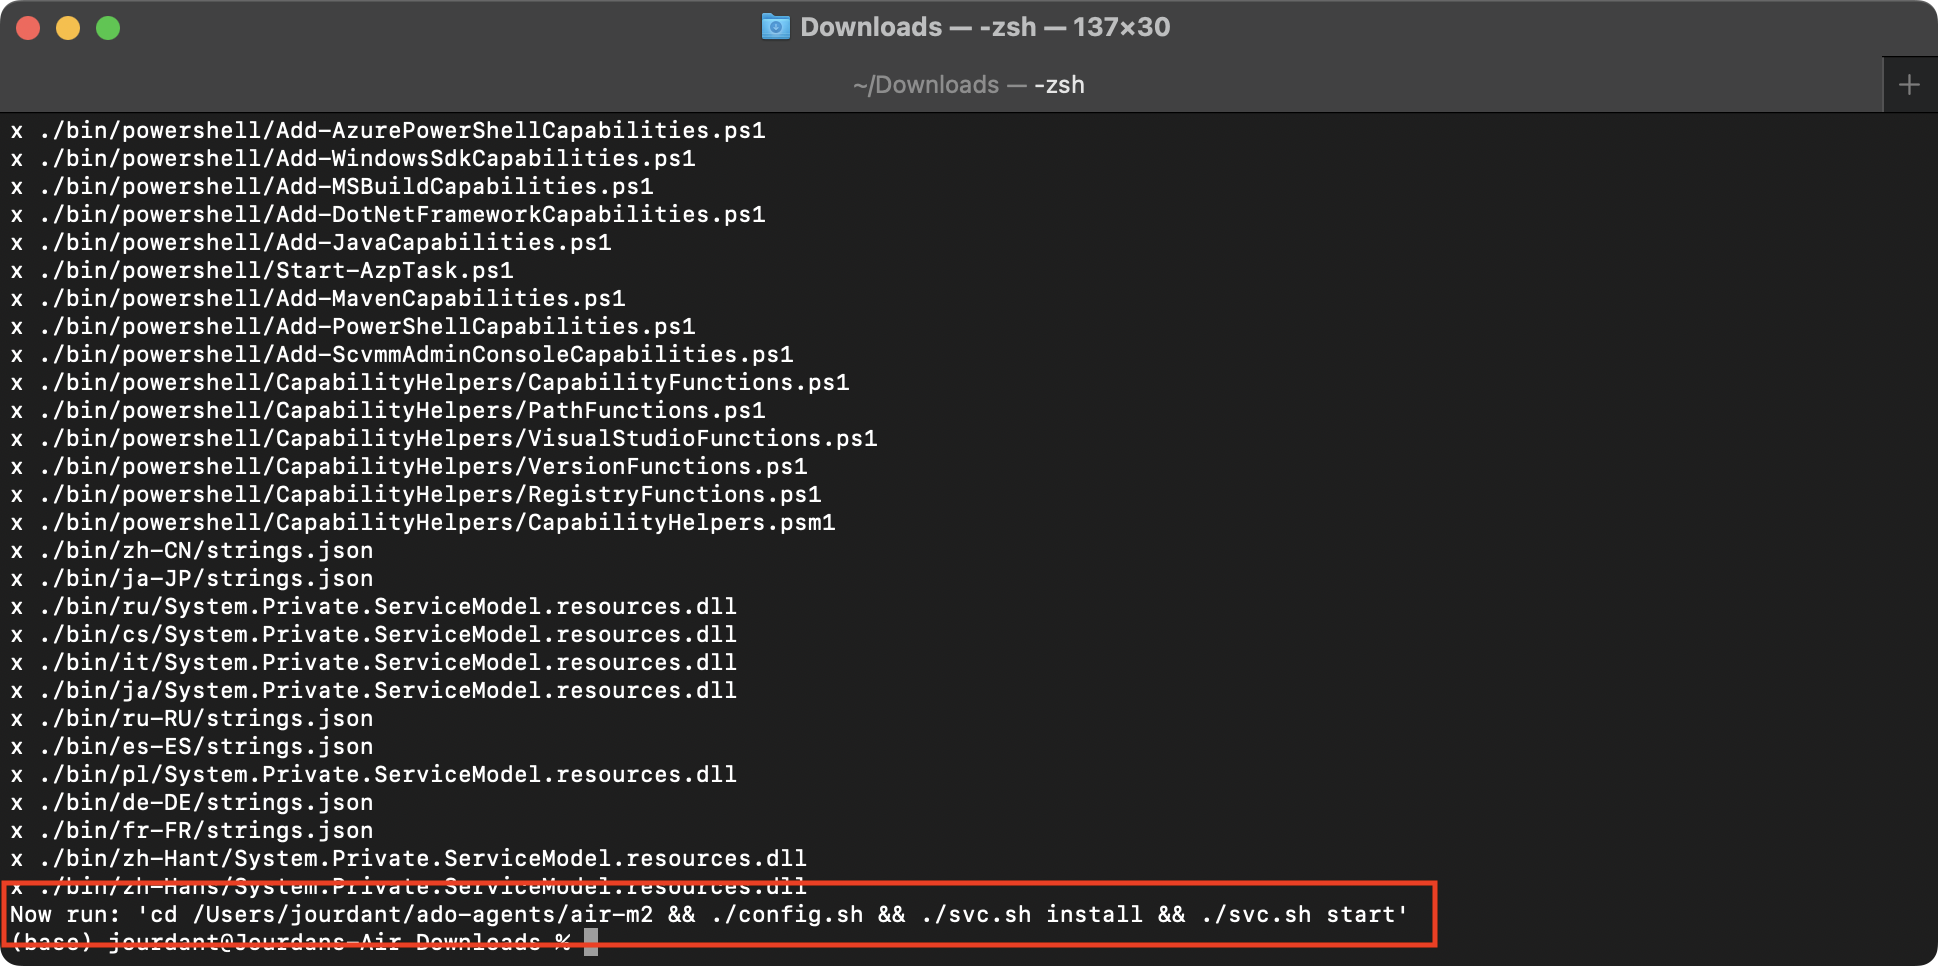
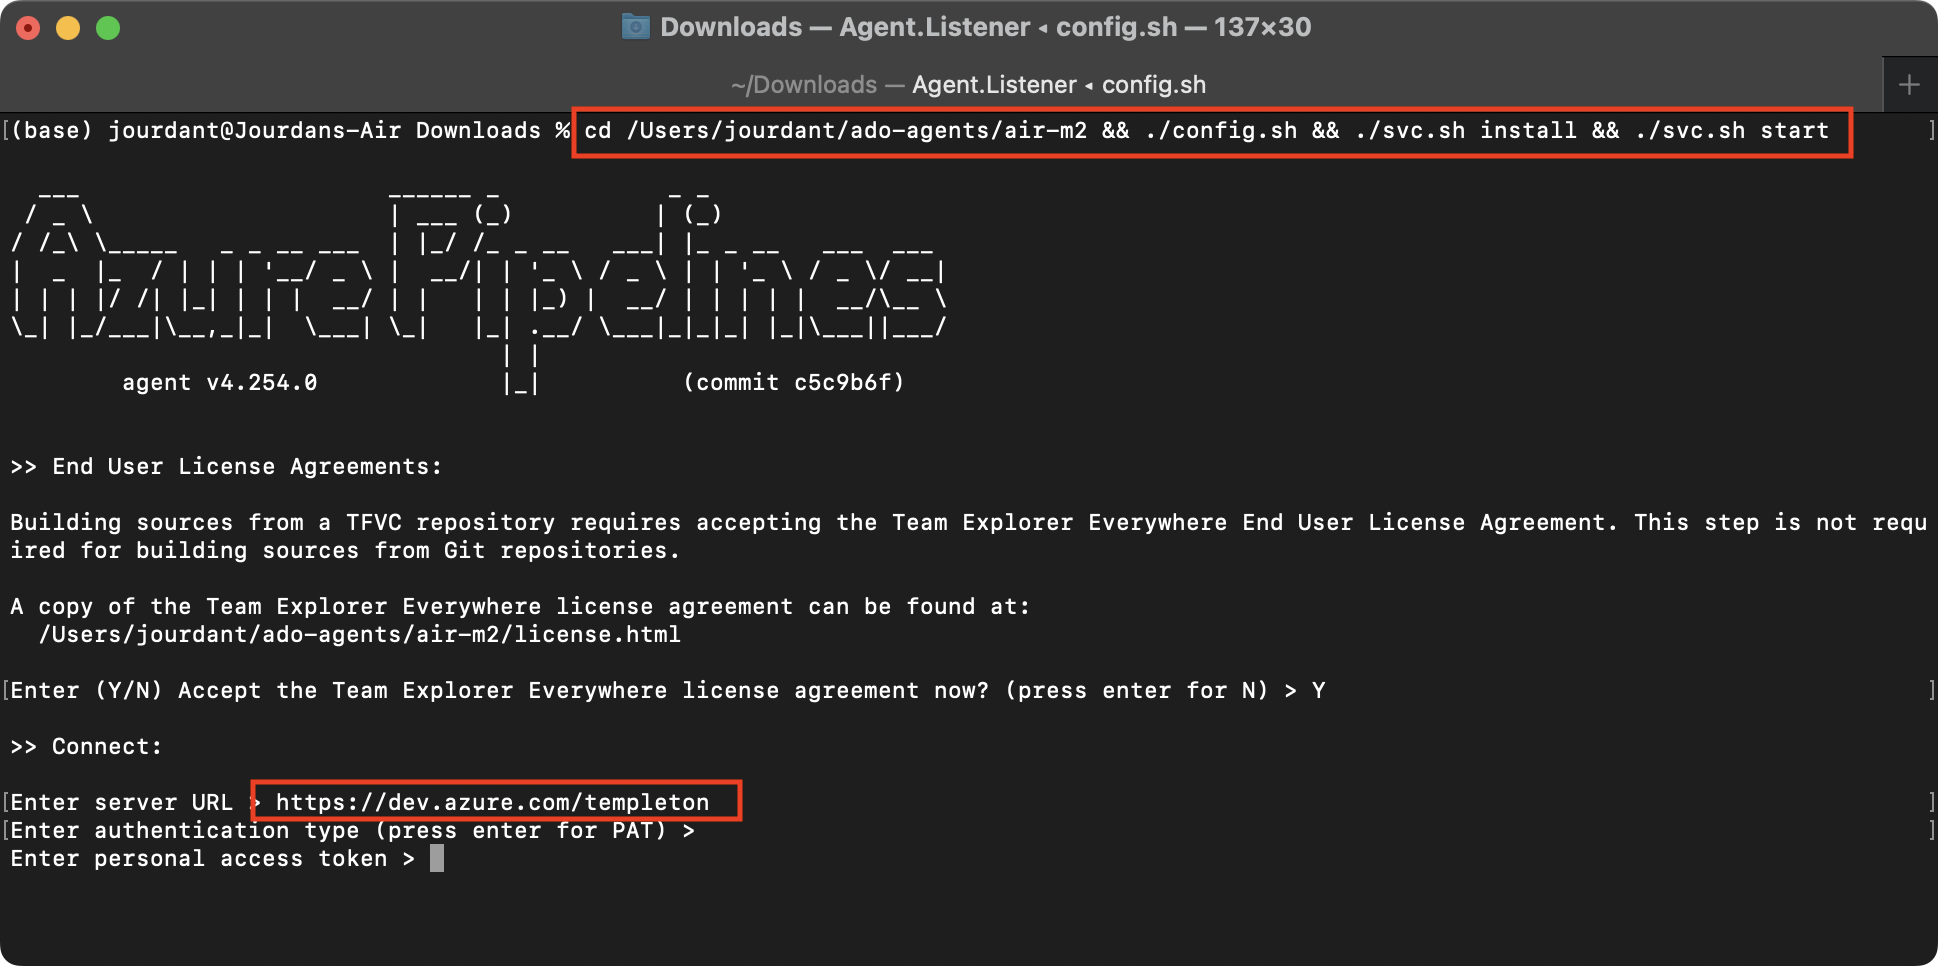
When running that command, you'll be guided through a setup process that has you type in the base URL to your Azure DevOps instance and enter a Personal Access Token (PAT) with permissions to enrol the build agent.
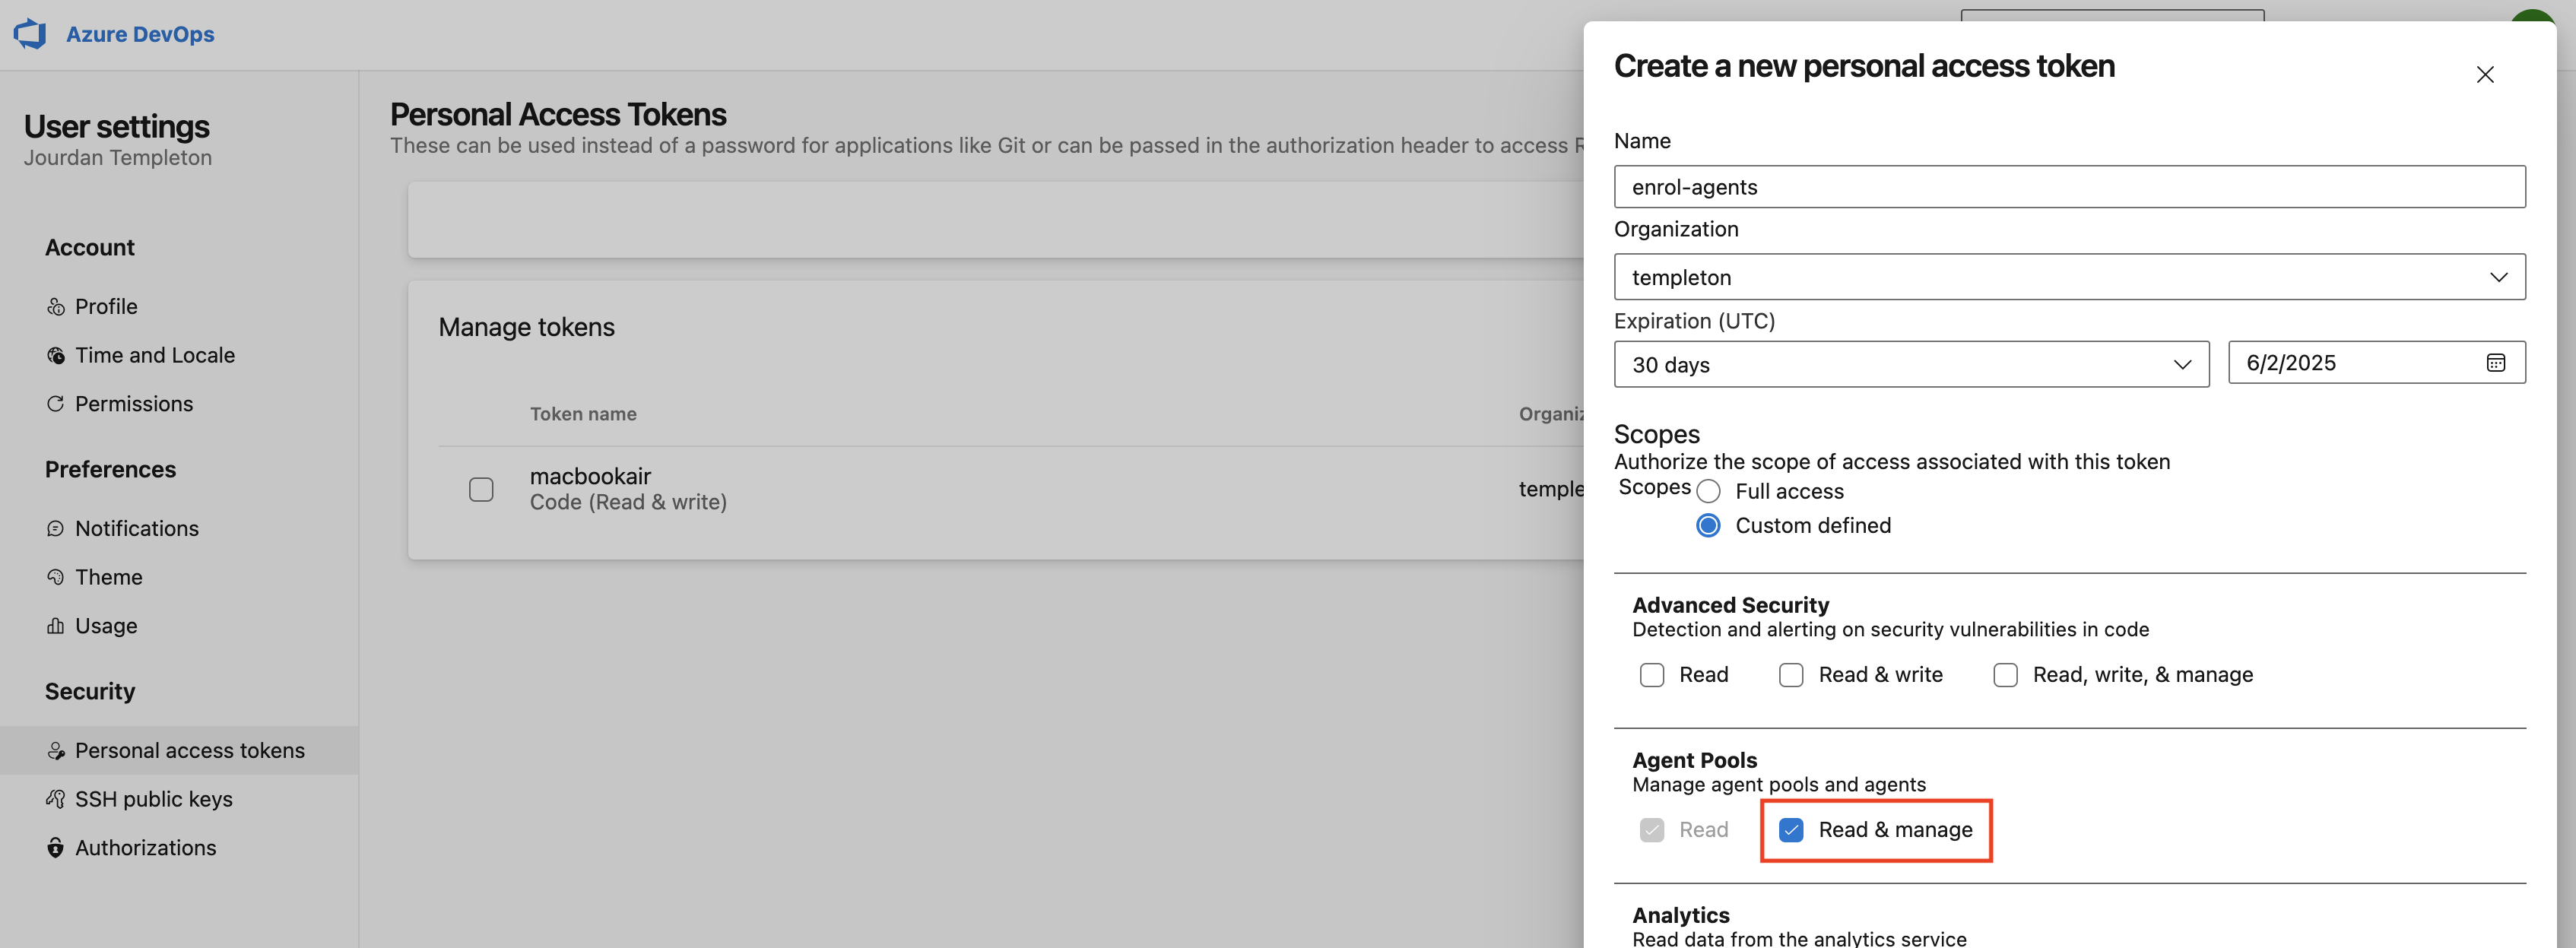
To create a PAT with the correct permissions, naviate to https://dev.azure.com/{your_org_name}/_usersSettings/tokens and click New Token.
Give it a name and a short expiry is fine, this PAT is only required to enrol the build agent. After this process, the PAT is not required for the on-going running of the build agent.
The only permission you need for enrolling new build agents is the Read & Manage scope. This can be found by clicking Show All at the bottom of the scopes list.
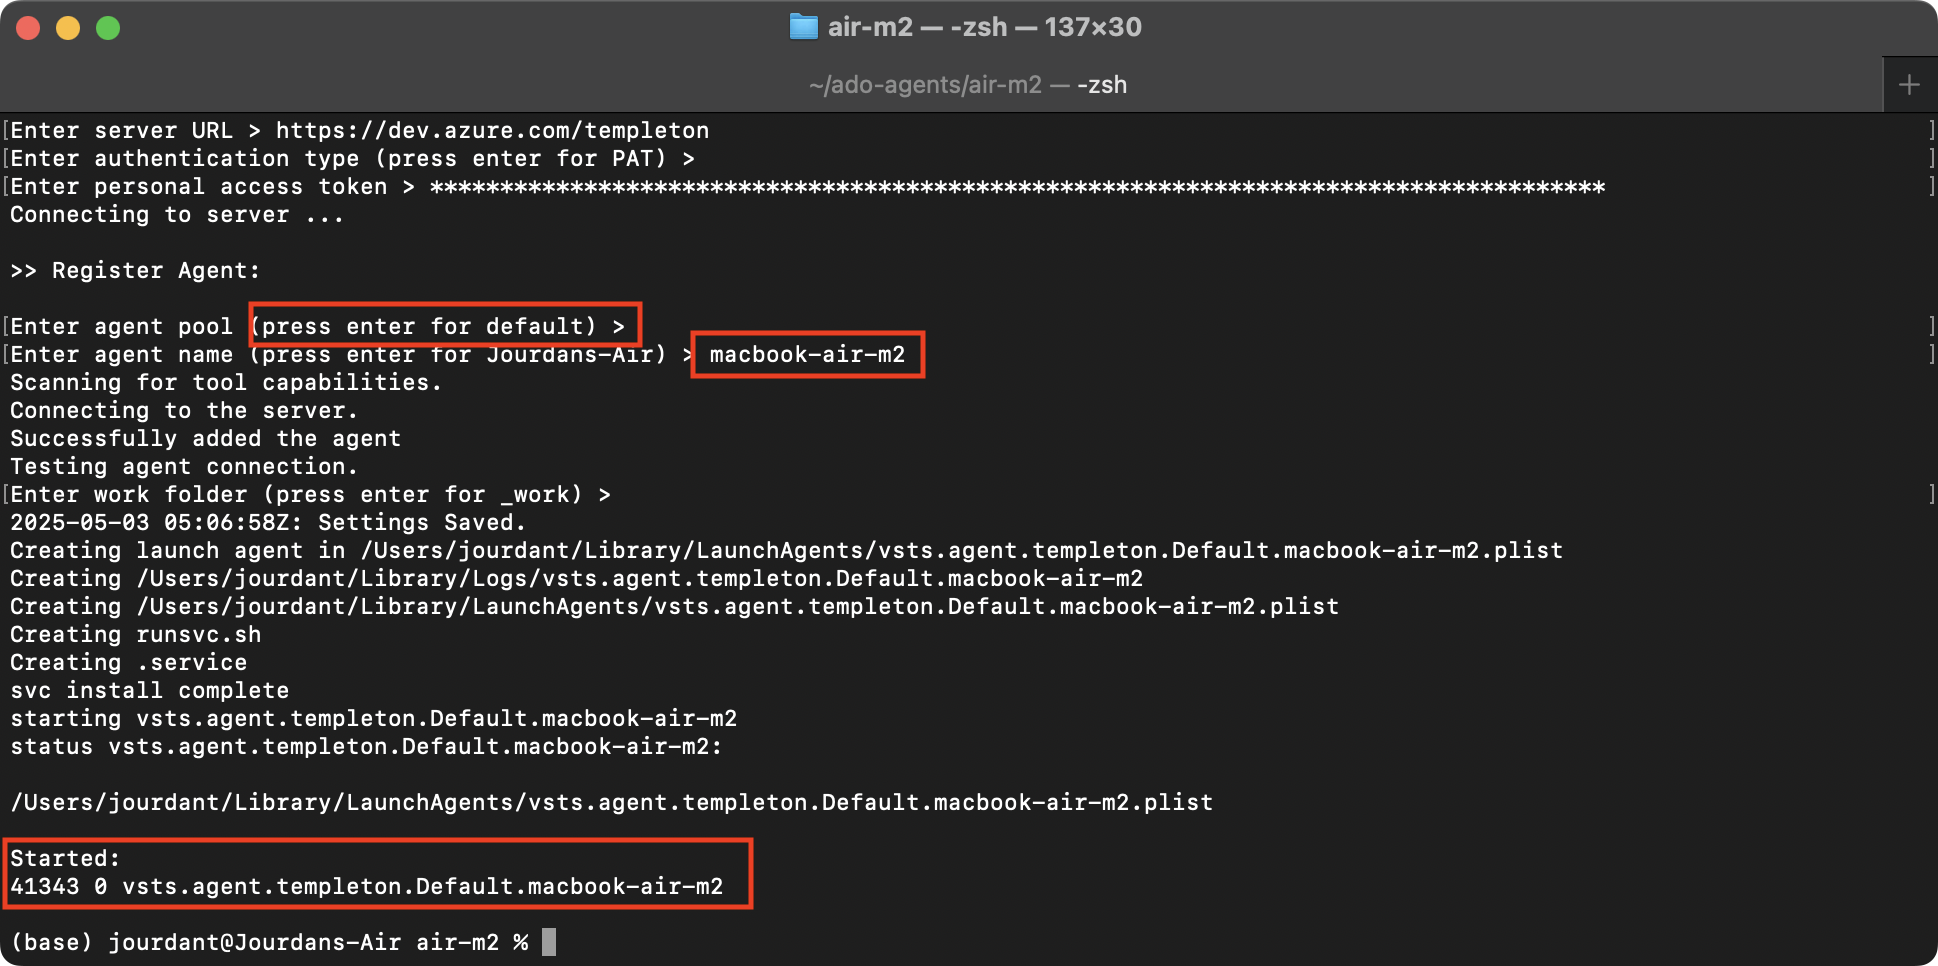
Paste the PAT back into the setup script and continue with the process. It's important to assign your agent to the correct Agent Pool.
Unless you have a complicated setup, often assigning to the Default pool is totally fine. You may choose to assign it to a new pool specifically for ARM64 Macs for example.
Once the configuration is complete, the command will proceed to install the service and start it. You should see that indicated on the output too.
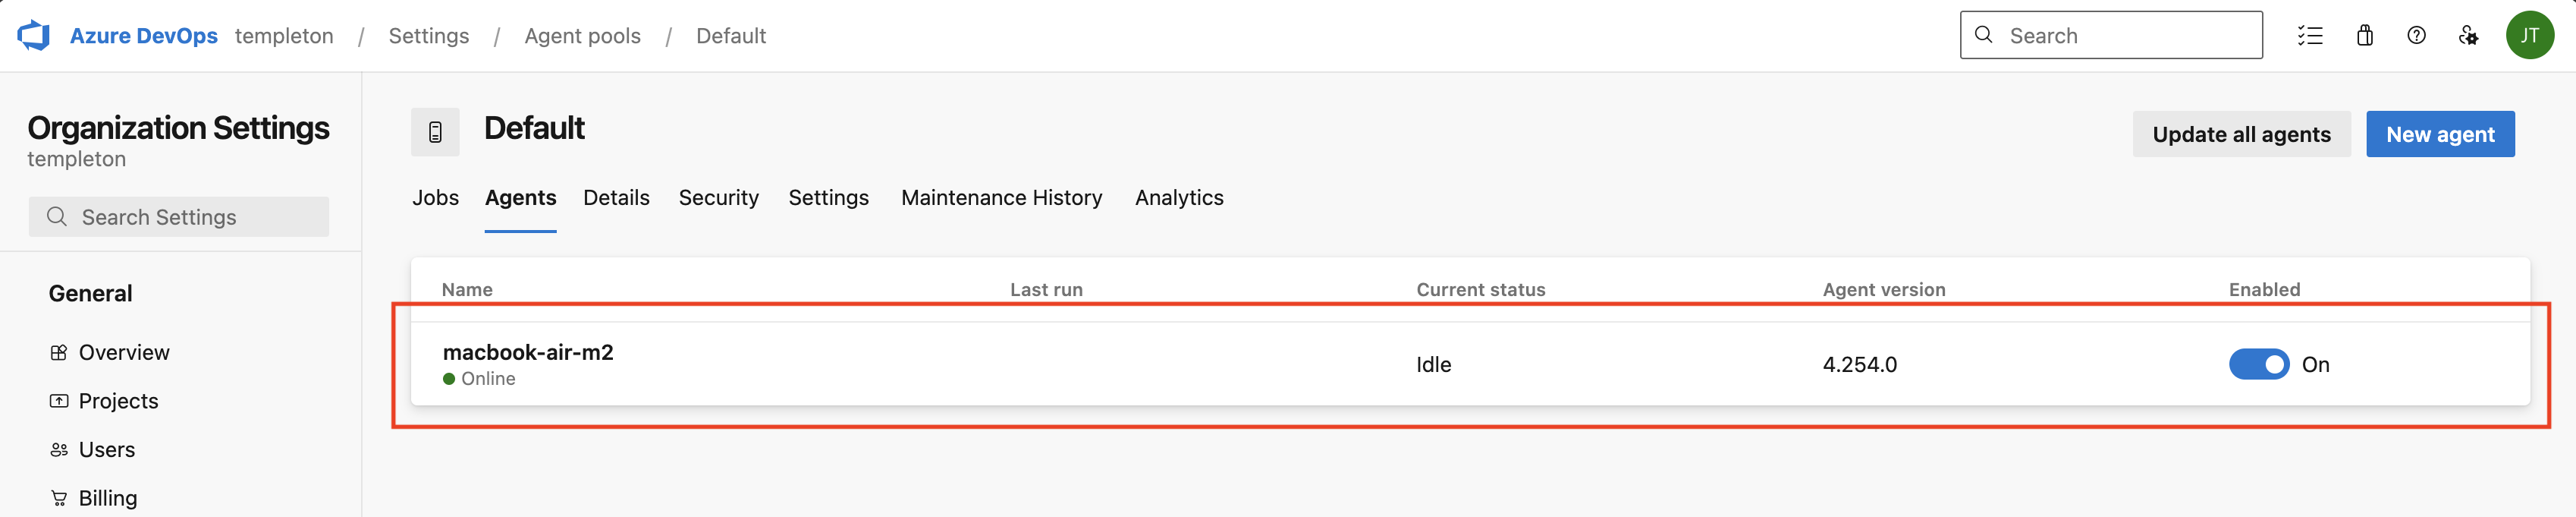
You'll also see that reflected in the Azure DevOps portal immediately with the state of your newly registered agent.
At this point, you're all done! There are a couple of things I'd recommend doing if you haven't already to be as best set up as possible. The main one is making sure you have homebrew installed - make sure it is the native arm64 homebrew too. This will enable all the tasks like Install Node.js to execute correctly from a pipeline.
Frequently Asked Questions
Can I run the x64 version on my Apple Silicon Mac? Yes. I tried this first, but it runs under the Rosetta compatibility runtime. This is less efficient and things don't work as smoothly. For example, if you need to execute homebrew, it will expect the x64 version and that will expect to install x64 binaries. It's not worth it.
How do I uninstall an agent? There are two commands to run to remove the agent. Make sure you are in the directory where the agent files were extracted:
./svc.sh stopand./svc.sh uninstall, then feel free to delete the directory and remove the agent from the Azure DevOps console.Can an Apple Silicon Mac build for Windows and Linux too? Yes. This is why it's my favourite platform for doing builds. This way a single build agent can compile apps for iOS and macOS, as well as building assets to run on Linux and Windows too. I currently have this working for a number of projects.
Can I use the script above for my x64-based device running macOS? Yes. Just update the architecture from arm64 to x64 in the script above, everything else should work fine.
//jourdant